[ad_1]
It seems that making your individual nail polish just isn’t solely doable, it’s additionally really fairly straightforward and reasonably priced with the suitable components. We’ll present you methods to combine and match colours to create your individual customized nail polish shades.
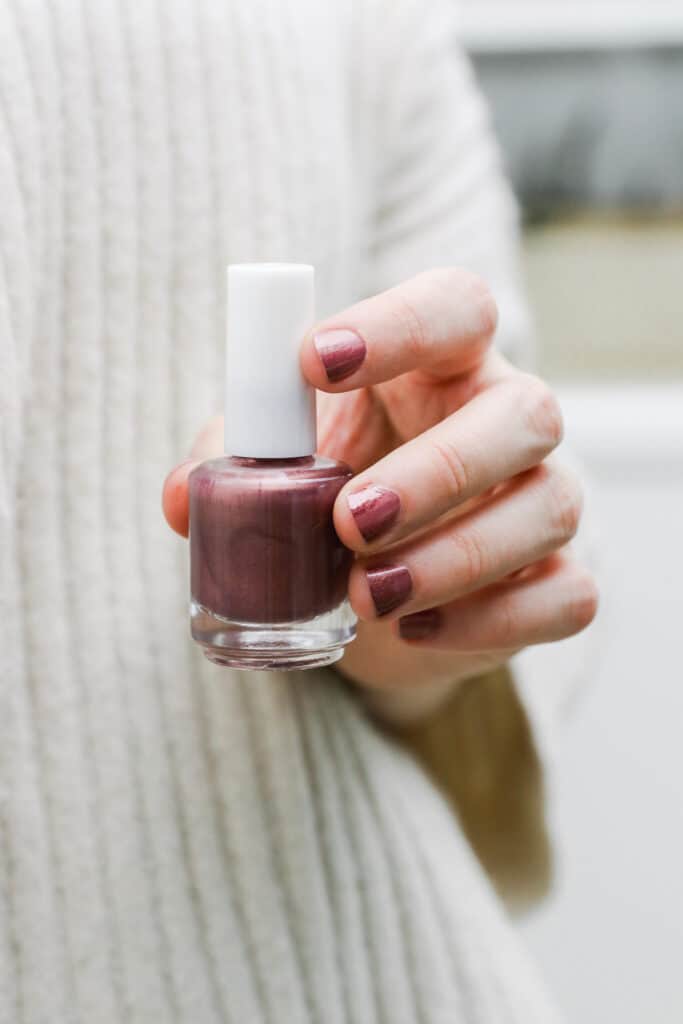
Increase your hand in case you’re all the time drooling over these attractive nail artwork images throughout social media. These girls are #nailingit. I gravitate towards pure nail designs, however generally you need to take it up a notch for holidays or a special day, proper?
Properly, guess what, you have got limitless choices for nail creativity by creating customized shades of polish. Don your mad scientist goggles and learn to make your individual nail polish at dwelling!
Soar to:
How To Make Nail Polish
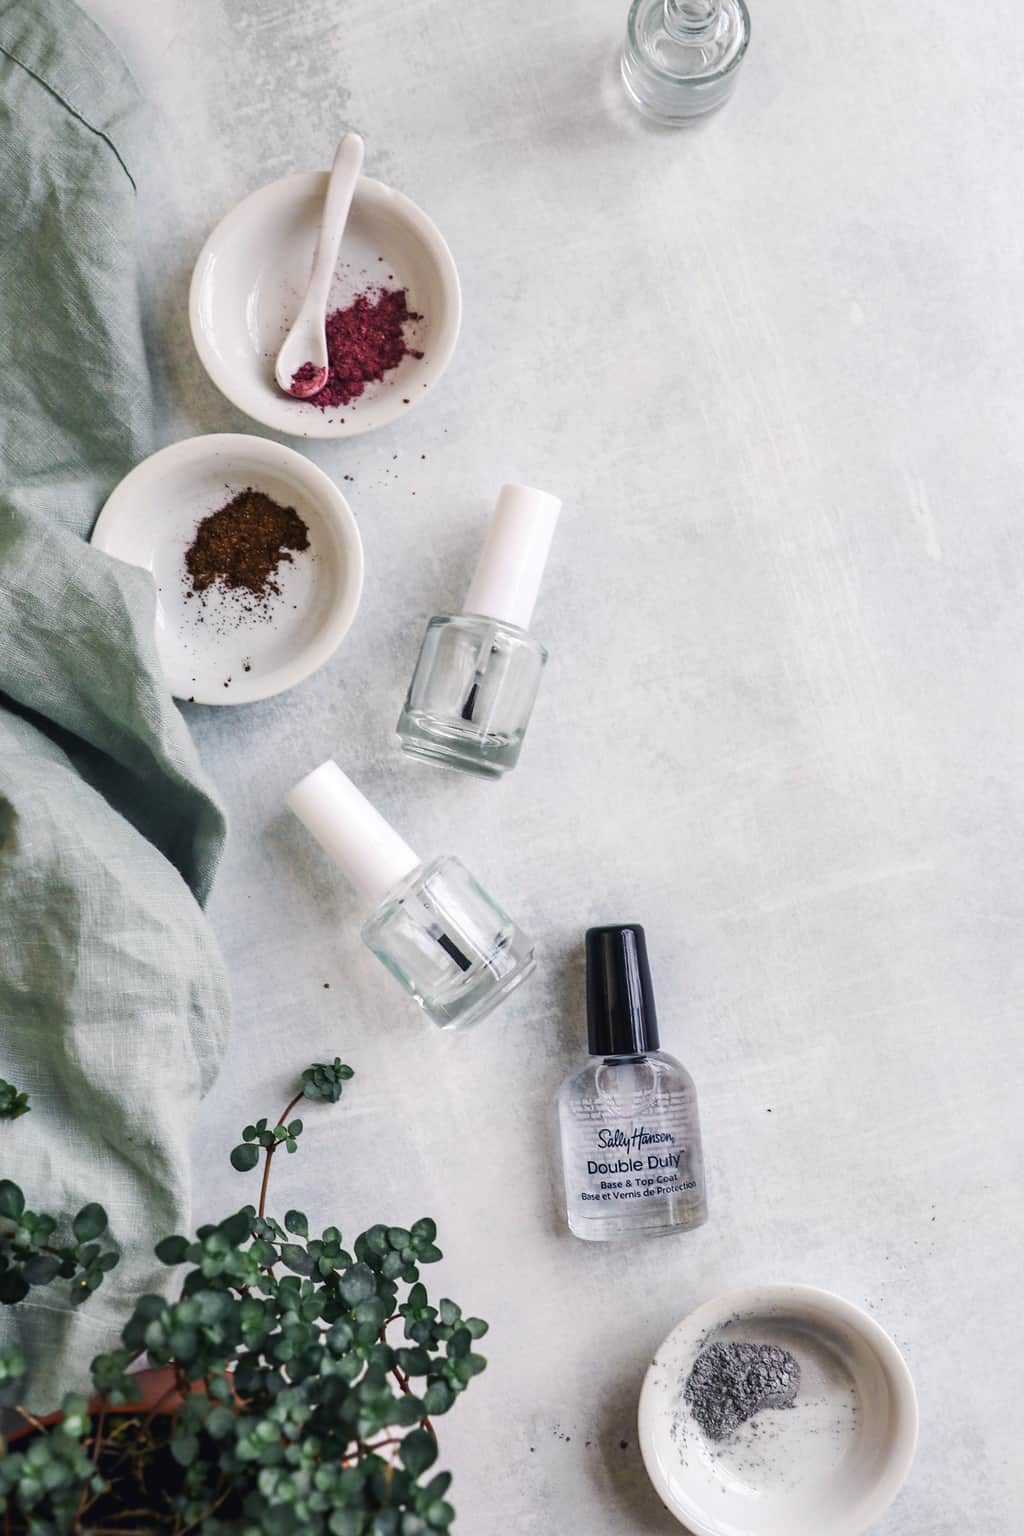
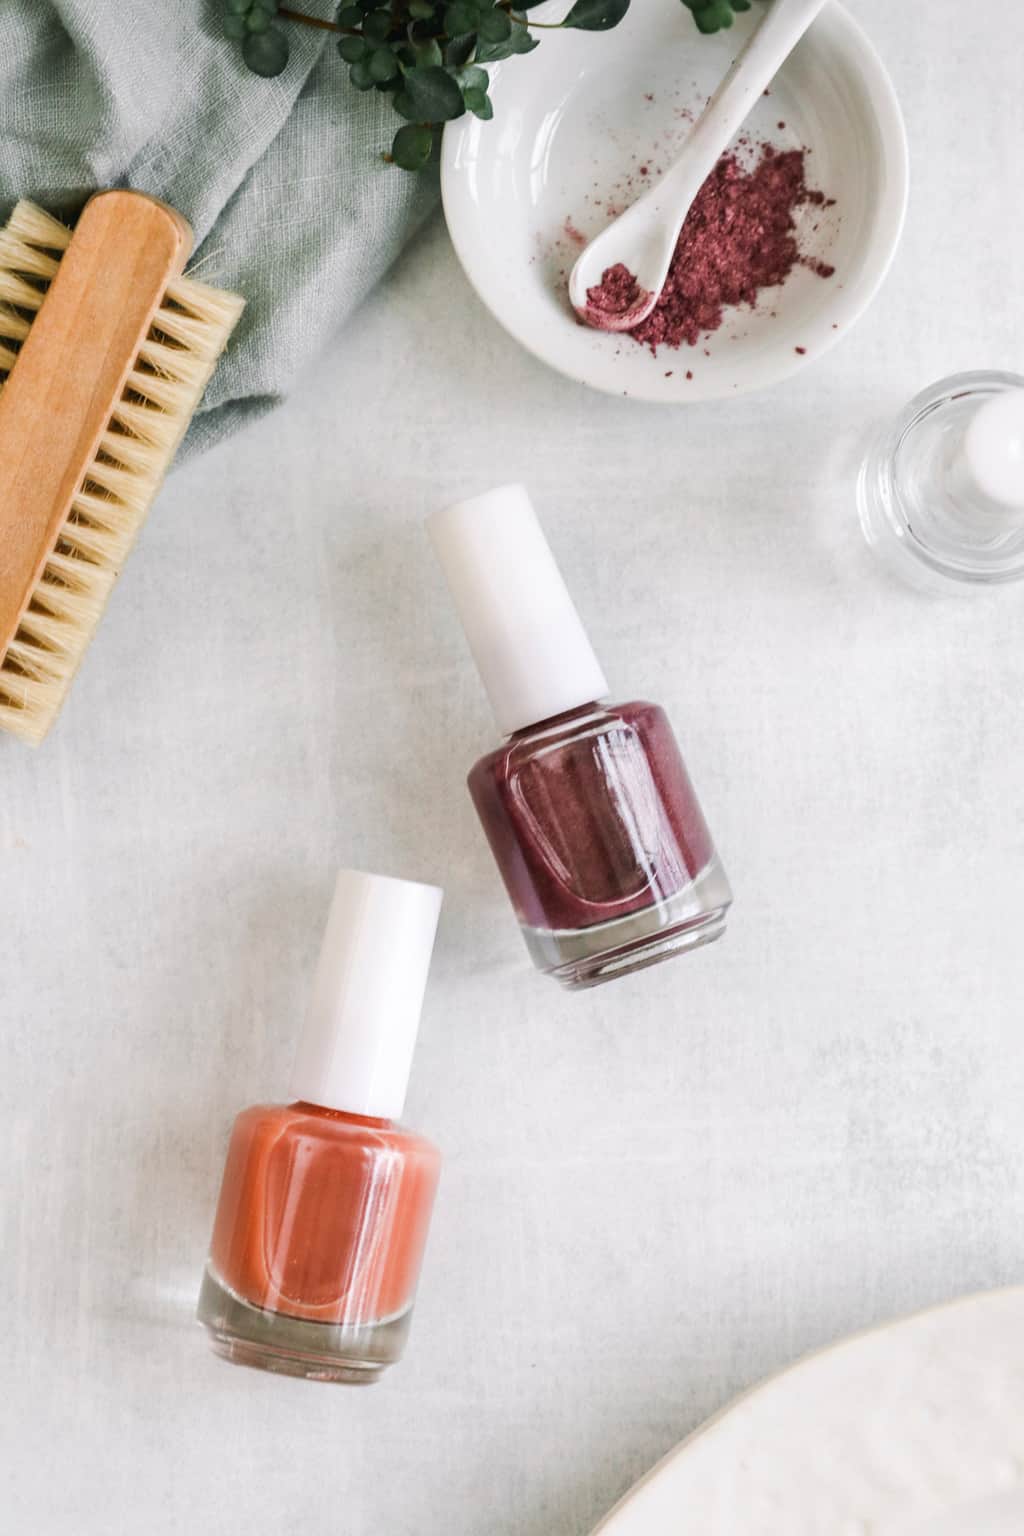
Begin by gathering your provides: clear nail polish, a number of empty nail polish bottles with mixing balls and colorant.
1. Use Empty Nail Polish Bottles
You don’t must purchase utterly new nail polish bottles for this, however you’ll need the little metallic mixing balls that generally come inside nail polish. My basecoat didn’t have ‘em.
So relatively than shopping for the blending balls individually, I simply picked up a number of empty bottles with mixing balls already included. Plus, having contemporary bottles permits me to see how the colour seems to be whereas I am mixing it and I could make a number of small batches of various colours if I select.
Every empty nail polish bottle ought to have two mixing balls. In case your bottles include one mixing ball per bottle, simply take a second mixing ball from the bottles you are not utilizing.
2. Begin with a Clear Base
I used some commonplace Sally Hanson base coat to make my polish as a result of it’s all they’d at my native grocery retailer.
However you’re not restricted to poisonous polish in case you’re attempting to go inexperienced. Select a non-toxic clear coat, like this one from Karma to restrict your publicity to toxins historically present in nail polish. Or do this nail polish suspension base that can make a number of bottles.
Begin by filling your empty bottle with the clear nail polish.
3. Select High quality Pigments
Choose high-quality pigments, mica powders, or colorants in your desired shade. These will be mica powders, eyeshadow pigments, and even meals coloring. The standard of your pigments will affect the vibrancy and longevity of your nail polish.
I like dry powders that can evenly disperse all through the clear polish. Mica powder is my colorant of selection. Mica powders are finely floor minerals that are available in a variety of colours. They usually have a shimmery or metallic look, making them nice for creating pearlescent or metallic nail polishes.
Coloured clay, glitter and even dried spices like turmeric and beetroot powder might additionally work (simply be forewarned, turmeric and beetroot powder could stain your nails).
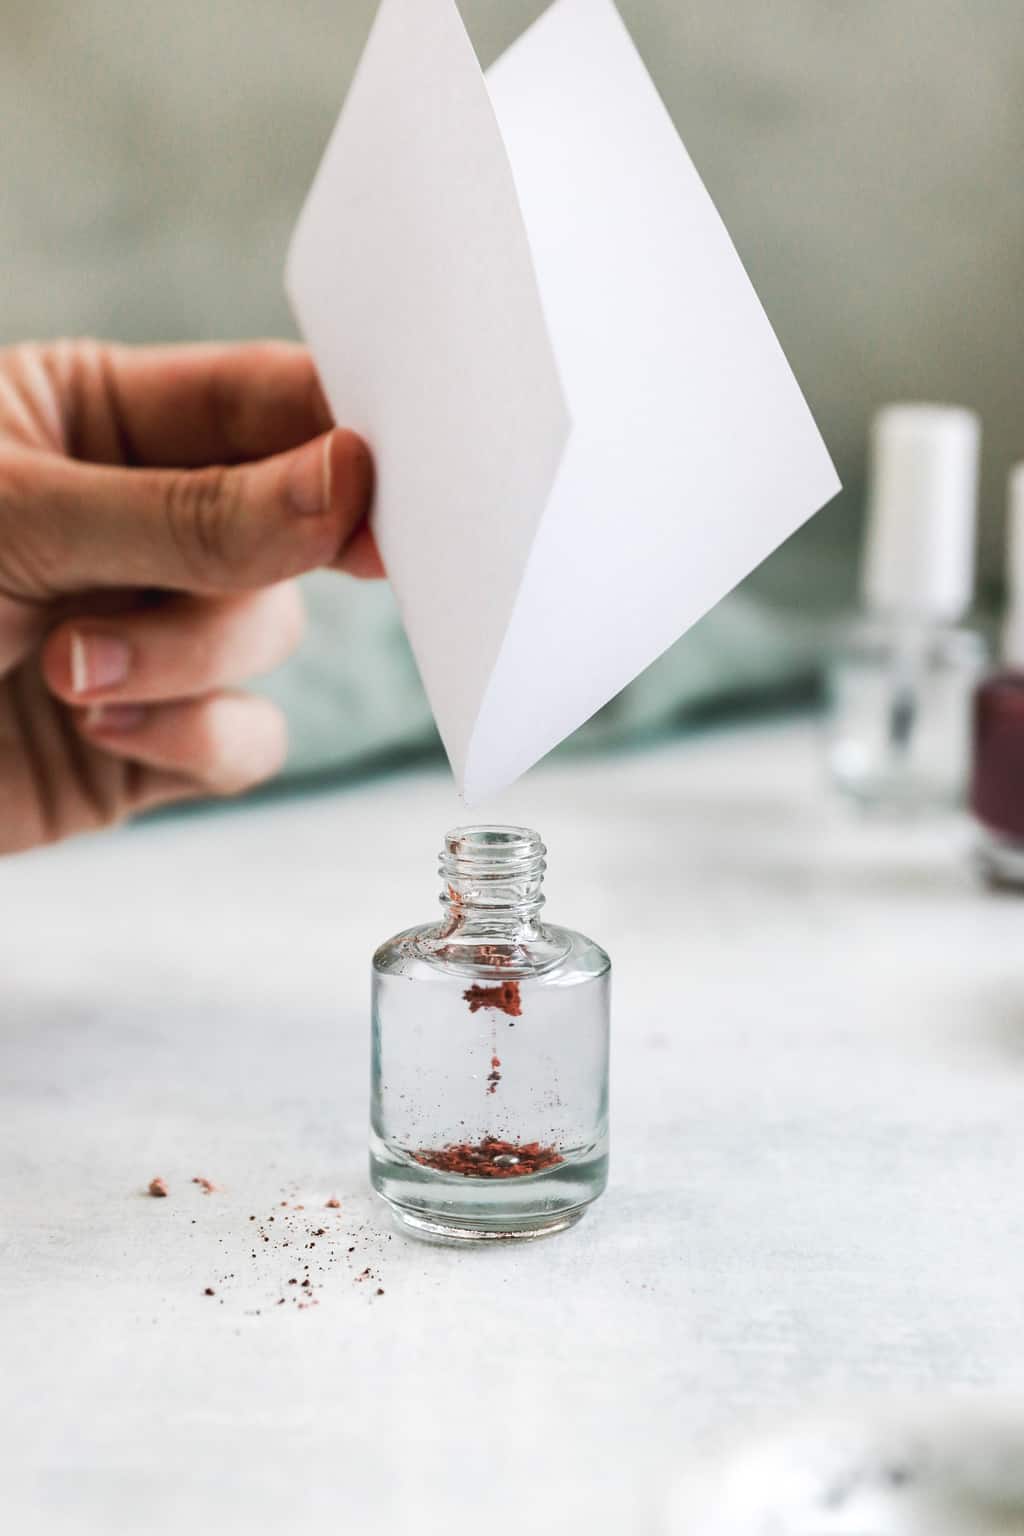
If you do not have a funnel, fold a bit of printer paper in half, place ½ teaspoon of colorant within the middle, and use it to information the colorant into the bottle.
4. Combine Totally
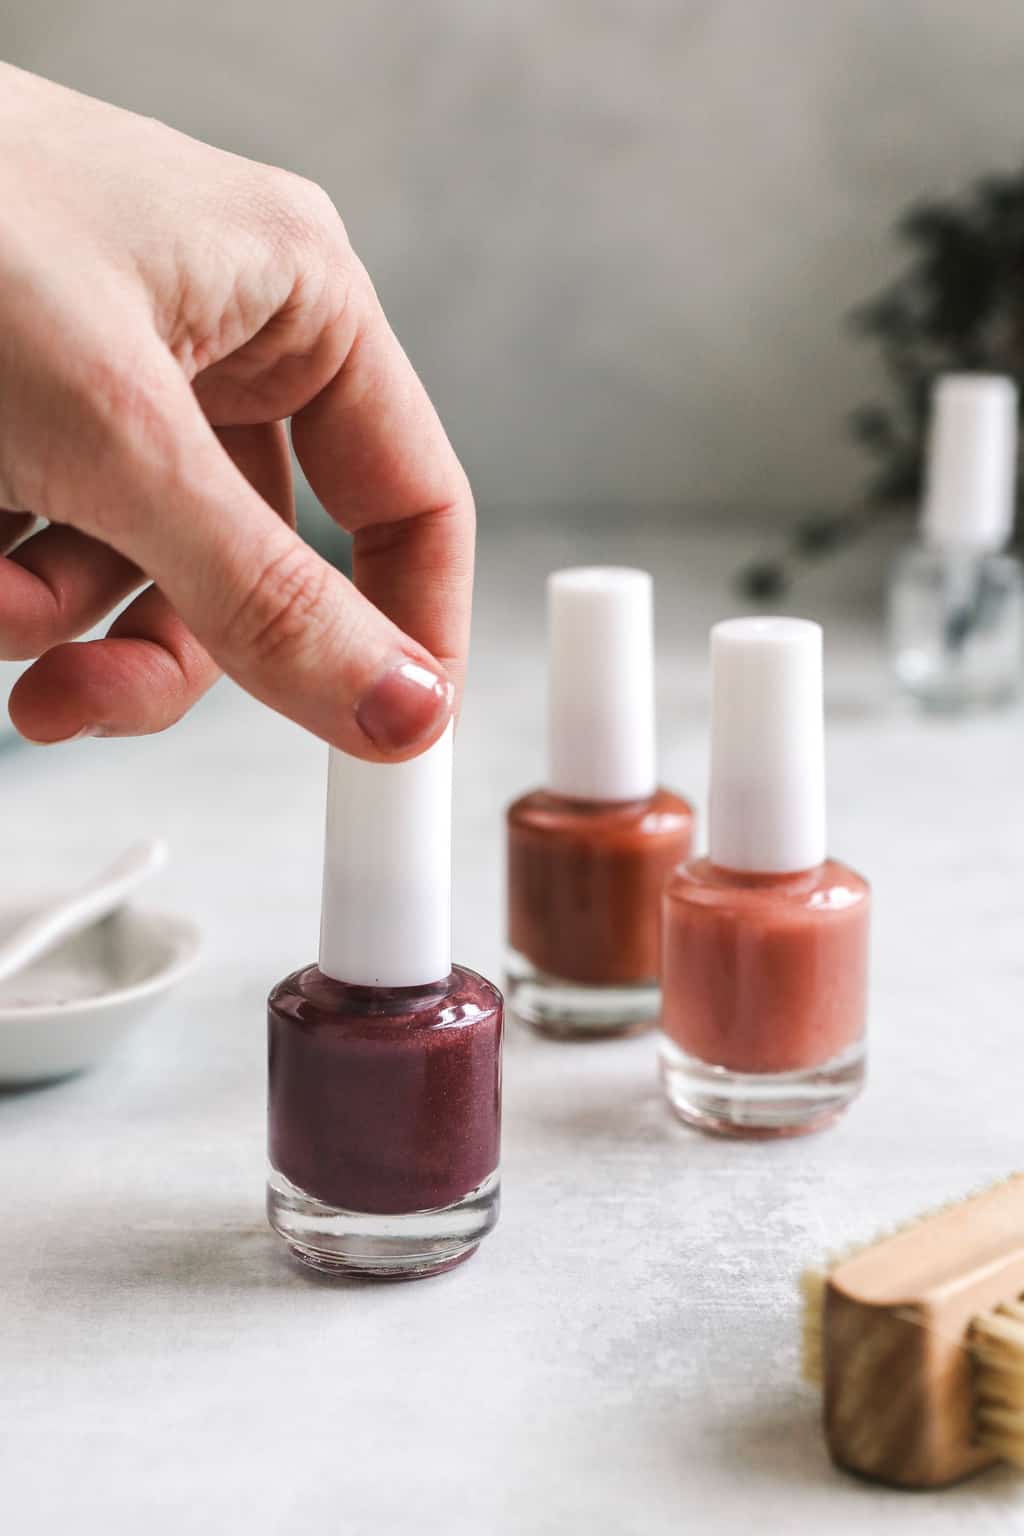
Begin with a small quantity of shade and regularly add extra till you obtain the colour you need. Use a toothpick or a mixing stick with stir the combination totally.
Screw on the lid and provides it an excellent shake for a minimum of 2-3 minutes. In the event you’re not pleased with the colour, add extra colorant till you get a shade you’re pleased with. You would possibly need to paint one nail to see the way it takes care of the polish has dried.
Trace: I didn’t have any bother with shade or sparkles rubbing off on my fingers or garments, however relying in your selection of colorant, it may be a difficulty. The one technique to know for positive is to check it!
Extra Nail Polish Powder Choices
There are numerous forms of pigments and powders that you should use to create customized nail polish colours. Utilizing them in a transparent nail polish base permits the colour to shine by.
For all powders, begin with a small quantity of pigment (about ⅛ to ¼ teaspoon) for a delicate shade. Improve the quantity if you would like a extra intense shade.
Glitter Nail Polish
Glitter powders add sparkle and shine to your nail polish. They arrive in numerous particle styles and sizes, permitting you to create varied glitter results, from tremendous shimmer to chunky glitters.
Matte Nail Polish
Matte pigments present a flat, non-shiny end to your nail polish. Make your individual matte nail polish by including matte powder or a matte agent like cornstarch or baking soda. Begin with a small quantity, roughly ¼ teaspoon, and add it to the clear nail polish. You’ll be able to regulate the quantity to realize the extent of matte end you need.
Do not forget that the matte impact would possibly change barely because the polish dries, so give it a while to completely see the matte end. In case your nail polish turns into too thick over time, you’ll be able to add a number of drops of nail polish thinner to get again to the suitable consistency.
Holographic Nail Polish
Holographic or chrome powders are sometimes used to create mirror-like high-shine nail colours. Holographic pigments are normally extra intense, whereas holographic glitter can present a shiny impact. Add the pigment or glitter to your clear nail polish.
Metallic Nail Polish
Creating metallic nail polish is an effective way to realize a shimmering, metallic end in your nails. To create the metallic impact, you may want metallic pigments or metallic nail polish. You too can use present metallic nail polish as a base and add extra pigment to accentuate the impact.
Neon Nail Polish
Neon nail polish is ideal for including a pop of shade to your manicure! To make your individual neon nail polish, you may want neon pigments or neon nail polish. You probably have neon nail polish, you should use it as a base and add extra pigment to accentuate the neon impact.
In the event you’re utilizing neon pigments, begin with a small quantity and blend it totally. Proceed including pigment till you obtain the specified neon impact. In the event you’re utilizing neon nail polish, you’ll be able to regulate the depth by including extra of it.
Extra Polish Powder Choices:
Fluorescent Powders: Fluorescent pigments are vivid and glow underneath blacklight. They’re supreme for creating distinctive nail polishes which have a glowing impact in sure lighting situations.
Thermochromic Powders: Thermochromic pigments change shade with temperature. You need to use these powders to create nail polishes that shift colours relying on whether or not your nails are heat or cool.
Chameleon Powders: Chameleon pigments shift colours relying on the angle of the sunshine. They create a dynamic, color-changing impact and might add depth to your nail polish.
Iridescent Powders: Iridescent pigments create a play of colours, much like the shimmering impact of a cleaning soap bubble. They’re nice for reaching a multi-dimensional and ethereal look.
Storing Home made Nail Polish
Correct storage is important to keep up the standard of your selfmade nail polish. Listed here are some suggestions that will help you retailer your DIY nail polish successfully:
Shake Earlier than Utilizing: In case your nail polish sits for an prolonged interval, pigments and different components could settle on the backside. Earlier than utilizing the polish, shake the bottle nicely to make sure the colour and consistency are evenly distributed.
Use Clear Nail Polish Bottles: Clear bottles are preferable for selfmade nail polish as a result of they let you see the colour and consistency with out opening the bottle. In the event you use coloured bottles, label them with the identify and date of creation for straightforward identification.
Label the Bottles: Clearly label every bottle with the identify of the colour, any particular particulars in regards to the combine, and the date of creation. This helps you retain observe of your creations and use them earlier than they probably expire.
Use Nail Polish Thinner If Wanted: Over time, selfmade nail polish could turn into thicker. If this occurs, you should use nail polish thinner to revive the specified consistency. Add a number of drops, shake nicely, and take a look at the polish.
FAQ
Sure, you should use eyeshadow or different make-up powders to paint your nail polish. Nevertheless, be certain that they’re finely floor and appropriate to be used in cosmetics.
Maintain the polish bottle tightly sealed. And storing your nail polish in a cool, darkish place away from direct daylight may also help forestall untimely drying.
Sure, you should use coloured nail polish as a base. Nevertheless, utilizing clear nail polish base offers extra management over the colour and depth.
No, do not use common craft glitter in nail polish. It isn’t tremendous sufficient and will trigger texture points. Use cosmetic-grade glitters particularly designed for nail polish
Use nail polish thinner to skinny out your selfmade nail polish. Add a number of drops of thinner, shake nicely, and take a look at the polish till you have got the consistency you need.
[ad_2]
Source_link